...and I am sooo not liking it! I am so very bummed that I have grown a severe allergy to the out of doors. It is a beautiful, gorgeous day and yet I have to spend it inside despite longing to be outdoors. Trying to keep it all in perspective though, as I know there are many individuals out there struggling with so much more...
So, on the bright side, I thought I'd post a few pics i took from this past week. A little bit of happy, a little bit of crazy (as in the weather!) and a little bit of every day life here in our little part of the world.
Ethan had his big piano festival last Sat. He had been practicing his pieces since last November. All of his hard work paid off as he earned a "Superior" rating on both pieces! Way to go Boo! :)
Here's the craziness to the weather. So typical of life in the Ozarks-- One day beautifully sunny, perfect day for flying a kite--The next day= Hail/Ice Pellets come crashing down from the sky! Sheesh!
Ouch!
Sunday, March 20, 2011
Saturday, March 12, 2011
Misting/Spray Ink Color Guide Tutorial
So, I don't know about you, but as my stash of spray inks has grown, I realized I needed a way to visually help me know what each color of mist looked like on paper. So, here's what I did to help me keep my colors straight:
3. Adhered each colored square in a column by manufacturer to an 8.5 x 11 piece of card stock. I labeled each color by the manufacturer's name listed on each bottle of mist.
*I made sure to leave room for new additions to my color chart in the future. (One never knows when the misting stash might grow!) ;-)
4. I slipped my color chart into an 8.5 x 11 sheet protector and placed it in a three ring binder I have for sketches, etc. and now it's ready to go for easy reference!
Another idea: Cut up your 8.5 x 11 paper into strips and make "paint sample" strips of the square color samples. Punch a hole in the top end of each strip. Align each strip of color samples with each punched hole and place a metal binding ring (you can purchase at Hobby Lobby or Michael's) through the stacked strips. Flip to the manufacturer or color you are looking for, and you are good to go!
Here's a pic of how I organize and store my mists. This organizer/tool caddy is a little something I picked up a few years back from Hobby Lobby. It has a handle and sits just inside the door of my walk-in closet where most of my scrapbook supplies are. I like that they are near-by and easily accessible.
Oh, I almost forgot! One other thing! Some mists do not show up well on white card stock. (One of the reasons I wanted to make up a color chart to begin with). For example, the Marshmallow Mist Tattered Angels Glimmer Mist is difficult to see on white card stock (no contrast). So, I punched out a black square and misted the Marshmallow Mist onto it for better visibility of the color. Silver mist was also difficult to see on both black and white. So, it ended up being sprayed on a light blue piece of card stock.
Hope you found this helpful! Happy misting!
Flip that Design!
Here are two recent layouts I created. I just turned the layout 90 degrees and created a completely different page. No need to reinvent the wheel.
Wednesday, March 09, 2011
Happy Birthday To My Big Sis Linda! (aka Linny!)
Happy birthday to my Big Sis, Linny!!! (I LOVE YOU SO MUCH! WE LOVE YOU SO MUCH!)
So, so wish she didn't have to spend it in the hospital fighting leukemia!!! I can't change the situation other than praying to God that he will heal her. I realize that. But I just want her to know how much she is loved and how many people care for her. She already got her birthday gift a week or so ago. Mick and I went in with my mom and dad and got her an iPad for those times when she may not have visitors, but I still wanted to try to make her day special anyways. She's not really been feeling up for visitors as she has been losing her hair and has been fighting off a bad infection with ulcers in her throat that make it extremely difficult to talk, to swallow, to eat. Basic everyday tasks that all of us (myself included) take for granted.
I was thinking, it would be special for her to know there are "Cyberfriends" and family out there who are thinking of her, wishing her well, and praying for her. If you would like to send a little "Cyberlove" her way, please post a comment here on my blog. I'll be sure she reads it. I think it would really make her day to know that there are all kinds of caring people out there, thinking of her and praying for her today.
Here are a few pics for our awesome family trip to Colorado in December. It was the first time in 10 years we three sisters had been together for Christmas. Special times indeed! We had just a little bit of fun! (And a whole lot of laughs!!) Most of these pics were with my point and shoot, so they are definitely lacking in quality!

So, so wish she didn't have to spend it in the hospital fighting leukemia!!! I can't change the situation other than praying to God that he will heal her. I realize that. But I just want her to know how much she is loved and how many people care for her. She already got her birthday gift a week or so ago. Mick and I went in with my mom and dad and got her an iPad for those times when she may not have visitors, but I still wanted to try to make her day special anyways. She's not really been feeling up for visitors as she has been losing her hair and has been fighting off a bad infection with ulcers in her throat that make it extremely difficult to talk, to swallow, to eat. Basic everyday tasks that all of us (myself included) take for granted.
I was thinking, it would be special for her to know there are "Cyberfriends" and family out there who are thinking of her, wishing her well, and praying for her. If you would like to send a little "Cyberlove" her way, please post a comment here on my blog. I'll be sure she reads it. I think it would really make her day to know that there are all kinds of caring people out there, thinking of her and praying for her today.
Here are a few pics for our awesome family trip to Colorado in December. It was the first time in 10 years we three sisters had been together for Christmas. Special times indeed! We had just a little bit of fun! (And a whole lot of laughs!!) Most of these pics were with my point and shoot, so they are definitely lacking in quality!
Catching snowflakes!
"Charlie's Angels" Silly Pose
Thanks in advance for putting a little J.O.Y. in my sister's birthday!
Have a J.O.Y.-filled day!
{Hugs}
Suz
Tuesday, March 08, 2011
FYI iPhone "No Sim" Error Message-Problem Fixed!
Hello peeps. Just a friendly little FYI if you are an iPhone user. I dropped my phone today on floor of garage (with it's heavy duty cover on it). It wasn't working and wouldn't allow me to make calls. It said "No Sim." So, I went to my "Settings" and turned on the "airplane" mode for about 20 seconds. Then I turned the "Airplane" mode off again and now my phone is up and running. Hallelujah and no expensive trip to the AT&T store!!! A 20 second fix and no service fee! Woot! Woot! Thought I'd share the knowledge and love and pay it forward! :)
Monday, March 07, 2011
March FreeHand Scraps Layouts Continued
Here is another layout I completed from the March FHS Kit. Sorry it is cropped wonky. This layout was inspired by the Win, Lose or Draw cards of which I used a side from each card as the title to my layout.
And a few close ups:
More later! I still have a few more layouts to share from this kit!! It's the kit that keeps on going...and going... :)
Saturday, March 05, 2011
Lucky Lady Today
My sweet, generous and thoughtful hubby surprised me on Valentine's Day (even though I wasn't really in the mood to go out to eat as that was the day my sister, Linda, was hospitalized with leukemia and I was still reeling from the news).
We were sitting at our favorite local Mexican restaurant and he passed me a card across our booth. Inside the beautiful card (which, BTW, has inspired a layout idea for me!) were the lyrics to a favorite song of mine, sung by a favorite group of mine. I read the card and noticed at the bottom, a handwritten arrow was drawn that said "over." So, I turned the page and as I did so, a DVD fell out. My sweet hubby had converted our wedding videos and a few other videos to DVD for me. I know it took hours as he and the boys had banned me from my scrapbook/media room/guest bedroom/schoolroom to make it. So, I kind of knew he was up to something like that. He had mentioned buying some software to convert old movies to DVDs a few weeks prior. Nonetheless, I was thrilled and thanked him for his thoughtfulness in the gift and card.
What I didn't realize and of which he quickly began to point out to me, was that I had missed...
...THE BIG SURPRISE.
Yes, that's right people, there was more!! SO MUCH MORE of a surprise to come!
He told me I had missed something and that I needed to look at my card again. I looked back to my card and turned the page. Adhered to the back of the card were two tickets!!!!!
I was so shocked and surprised and excited and overcome with emotion I didn't know how to contain it, but knew in some small back part of my mind I need to contain myself as I was in a public setting. So, I was sitting there in the booth with my head down, shaking my head in a spasmodic, uncontrolled manner while stomping my feet quickly and as quietly as possible. But, of course, while doing this, a few small barely contained squeals of delight spilled out.
To say the least, I was quite the scene. This according to Mick. After nearly 16 years of marriage, I knew what he was thinking and maybe you are too: A restaurant scene, a man, a woman...
...To the waitress, the man replies,
"... I'll have what she's having." (From When Harry Met Sally)
It was that kind of moment. Ok...not that kind of moment...but it definitely made Mick the "Dude" of the restaurant for making his wife so happy!
So anyone care to guess who we are going to have the JOY of listening to tonight? Those of you locally will know I'm sure. :-)
Well...let me give you a clue that Ethan created for me just the other day (such a thoughtful kiddo like his daddy):
First make a guess and then scroll down for the clue/answer. :)
Oh yeah!!!!! Rascal Flatts BABY!!!!! I SIMPLY CANNOT WAIT!!!!
Guess I need to go figure out what I am going to wear and get "prettified" as we so call it in this family of boys and a momma!
Oh...and the lyrics at the front of the card...none other than the lyrics that have come to be "Our Song"...
God Bless the Broken Road.
Melt a wife's heart.
My guy is so good.
I am so very blessed.
Thank you God for the "Unanswered Prayers" and for leading me down the broken road to the man you fully intended for me to share my life with.
So, my Valentine's day was very bittersweet and filled with much emotion. Rascal Flatts is a favorite of my sister's as well, and I am really looking forward to the day that she is well and we can go to see them together, and belt out along with the band, the words to "God Bless the Broken Road."
Have a J.O.Y.-filled day everyone!
{Hugs,}
Suz
Thursday, March 03, 2011
Update on My Sister Linda
Spoke with my sister yesterday and my mom today. My sister started losing her hair yesterday and developed terribly painful ulcers and swelling in her throat. She couldn't swallow or eat anything. Today it was worse, she acquired a fever and half her face and beneath her ear swelled up. The doctors believed her to have an infection in her bloodstream and gave her some "Big Gun" antibiotics to try to get rid of the infection and reduce her fever. The fever has dropped some, which was/is a good sign. On top of all of that, her bone marrow biopsy was today too. My mom said that the most painful thing (according to my sister) were the ulcers and the swelling. :( When I spoke with Linda briefly yesterday (can't believe she even answered!) her voice was barely discernible. It sounded like she was smothered under a pillow.
Breaks a sister's heart.
...So want to be there for her!
I'm glad I sent off a little care package out yesterday as she should receive it Sat. She was to have left the hospital today for a bit of a reprieve before heading back to the hospital next Wed. (her birthday) to begin her second round of chemo. Not exactly the birthday gift anyone would want-a trip to the oncology unit of a hospital and a nice round of chemo. Sigh.
Just wanted to update those of you who were wondering how she was doing. Hopefully the next update will have a more positive note to it!
Have a J.O.Y.-filled day!
Keeping the faith,
Suz
Breaks a sister's heart.
...So want to be there for her!
I'm glad I sent off a little care package out yesterday as she should receive it Sat. She was to have left the hospital today for a bit of a reprieve before heading back to the hospital next Wed. (her birthday) to begin her second round of chemo. Not exactly the birthday gift anyone would want-a trip to the oncology unit of a hospital and a nice round of chemo. Sigh.
Just wanted to update those of you who were wondering how she was doing. Hopefully the next update will have a more positive note to it!
Have a J.O.Y.-filled day!
Keeping the faith,
Suz
Wednesday, March 02, 2011
March Mini Tutorial
Hello everyone!
Suz here with a tutorial on a little mini album I made using the scraps from this month's kit! (And, just as an aside-- there wasn't much left to scrap with given all of the "goodness" in the kit! I used up very nearly all of it!)
1. GATHER: The first thing I did was to gather up my scrap remnants from the kit along with a few trusty tools, adhesive, and my Instax camera. (Love it! A quick and easy way to knock out a mini album in short order).
2. FRONT COVER: For the cover of my album I used remnant pieces of the lightweight 6x6 wooden paper that comes with the March 12 x 12 paper kit. (Remember, there is also a "mini album" kit option that contains an adorable Cosmo Cricket 4x6 black album. So for those of you who order that kit-you are already
"good to go" on the foundation of your album! :)
I trimmed two pieces of the wooden paper to 2.5 x 4 inches. This allowed room to punch holes at the top (using my Crop-A-Dile Big Bite punch tool) and room to house my Instax pics.
3. MIST: I misted the front cover with a "peacock blue" color and added some patterned paper, stickers, and embellies.

7. BACK COVER: For the back cover (which really could've been the front-lol) I punched out several hearts using punches from my stash. I arranged them to my liking and then used them as a mask to mist over. For the pink heart at the bottom, I punched a heart from a sheet of paper and lined up the negative (punched out area) of the heart over the"original wood colored" heart. Making sure the rest of my back cover was completely covered with this paper (to protect the area already misted with the blue mist), I then misted with a red color. I sprayed the originally white number "12" stickers to match the back cover as well. Misting is one way of stretching your kit(s) to the maximum. You can mist your white stickers to custom match them to your layouts and projects! Misting is tons of fun too! :)
Since I was making this for my near-teenage son, I opted to use an "on-hand" masculine looking dog tag chain that I easily cut down to size to bind it all together.
And there you have it! One mini album completed in an hour or two. Near instant gratification and a great way to document the things and people that are important to your loved one at one moment in time!!
Check back here or over at Freehand Scraps later for more reveals, more tutorials, and more inspirational ideas for your kits.
Happy Scrapping!
Suz :)
Suz here with a tutorial on a little mini album I made using the scraps from this month's kit! (And, just as an aside-- there wasn't much left to scrap with given all of the "goodness" in the kit! I used up very nearly all of it!)
1. GATHER: The first thing I did was to gather up my scrap remnants from the kit along with a few trusty tools, adhesive, and my Instax camera. (Love it! A quick and easy way to knock out a mini album in short order).
PLEASE NOTE: Don't worry if you don't have this camera. You can get wallet sized prints ordered online, at your local developer, OR...you can just print out a collage sheet of small pics at home using a photo-editing program like Photoshop or Photoshop Elements. If there is enough interest, I might be able to put together a short tutorial of how to print out a collage of smaller prints that would fit this album.
*Leave a comment here on the blog, if you are interested in a tutorial or if you'd like to see the rest of the album.*
2. FRONT COVER: For the cover of my album I used remnant pieces of the lightweight 6x6 wooden paper that comes with the March 12 x 12 paper kit. (Remember, there is also a "mini album" kit option that contains an adorable Cosmo Cricket 4x6 black album. So for those of you who order that kit-you are already
"good to go" on the foundation of your album! :)
I trimmed two pieces of the wooden paper to 2.5 x 4 inches. This allowed room to punch holes at the top (using my Crop-A-Dile Big Bite punch tool) and room to house my Instax pics.
3. MIST: I misted the front cover with a "peacock blue" color and added some patterned paper, stickers, and embellies.
4. ASSEMBLE: I then cut out several pieces of patterned papers and glued them back to back, punching holes at the top of each. It helps to use the first page with punch holes as a guide for aligning up the next holes you punch, to ensure that they are all even and "stack up" nicely.
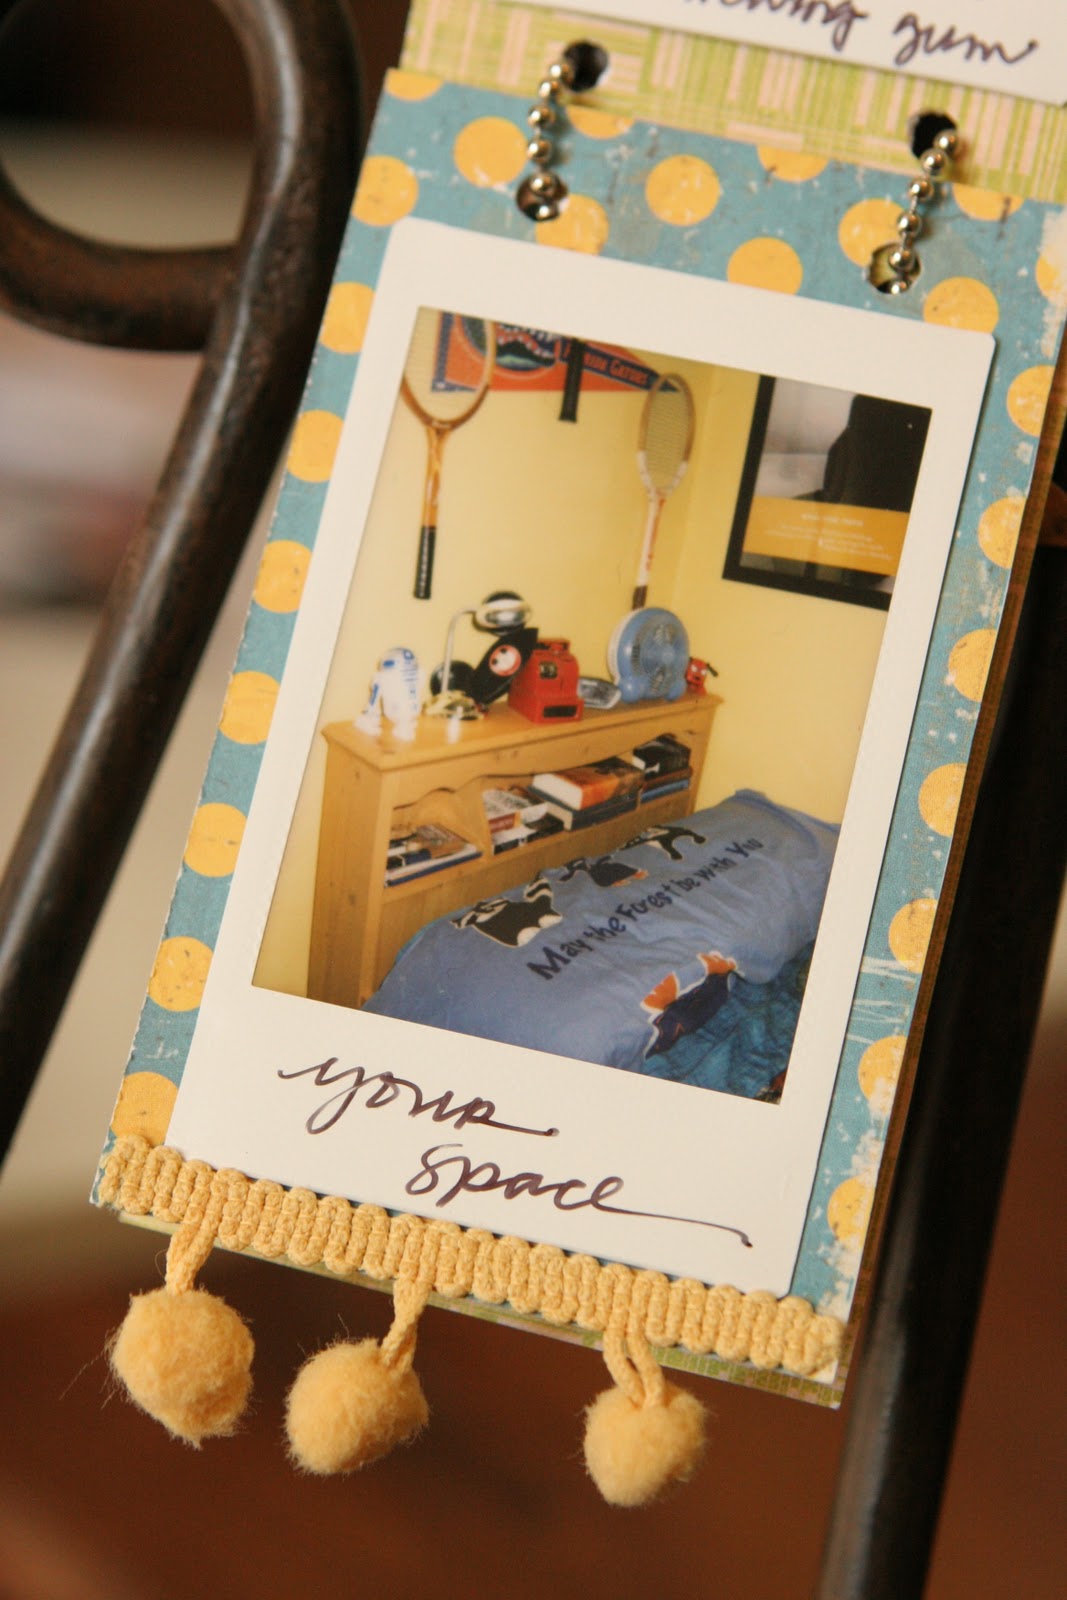
5. CAPTURE: Since I was making this album to commemorate "Twelve" of my eldest son's favorite things "At Twelve," I went around the house with my Instax camera and captured twelve different images that represented what my son is "into" at this time in his life. (Another idea: You could also take twelve pics on the twelfth day of the month and document images from that day in a mini album).
6. ADHERE: I adhered my Instax pics down on each page and wrote a brief description on each with my Black fine point Sharpie. I embellished the album with leftover lovelies, some stitching, and threaded the dog tag chain through the holes to "bind" it all together. Other options for binding: Baker's twine, string from shipping tags, ribbon, yarn, etc.5. CAPTURE: Since I was making this album to commemorate "Twelve" of my eldest son's favorite things "At Twelve," I went around the house with my Instax camera and captured twelve different images that represented what my son is "into" at this time in his life. (Another idea: You could also take twelve pics on the twelfth day of the month and document images from that day in a mini album).

7. BACK COVER: For the back cover (which really could've been the front-lol) I punched out several hearts using punches from my stash. I arranged them to my liking and then used them as a mask to mist over. For the pink heart at the bottom, I punched a heart from a sheet of paper and lined up the negative (punched out area) of the heart over the"original wood colored" heart. Making sure the rest of my back cover was completely covered with this paper (to protect the area already misted with the blue mist), I then misted with a red color. I sprayed the originally white number "12" stickers to match the back cover as well. Misting is one way of stretching your kit(s) to the maximum. You can mist your white stickers to custom match them to your layouts and projects! Misting is tons of fun too! :)
Since I was making this for my near-teenage son, I opted to use an "on-hand" masculine looking dog tag chain that I easily cut down to size to bind it all together.
And there you have it! One mini album completed in an hour or two. Near instant gratification and a great way to document the things and people that are important to your loved one at one moment in time!!
Check back here or over at Freehand Scraps later for more reveals, more tutorials, and more inspirational ideas for your kits.
Happy Scrapping!
Suz :)
Tuesday, March 01, 2011
March Freehand Scraps Kit is Now Available!
Head on over to Freehand Scraps and check out the new March kit, "Bingo!" It is chock full of scrapping loveliness and it is all around an a-w-e-s-o-m-e kit!
*I just mentioned that because I know I have a few blog readers who are just getting started with scrapbooking.
Also, everything you see in my designs have been made with kit components aside from a very few, scant items; like mist, colored buttons, embroidery floss.
One example is the headband above: The floral ribbon is from my stash.
EnJ.O.Y. your day. Check back here throughout the week as I will be posting more about the kit here and have a tutorial or two to boot! Feel free to post any questions by commenting. :)
Click on any image to view larger.
Oh, just want to mention for those of you who might not be aware of it, the patterned papers are two-sided. So, if you don't see the paper that I've used in my layouts in the kit (when you check out Freehand Scraps' website), the paper is really there! It's just that I've used the "flip" or the "B" side.*I just mentioned that because I know I have a few blog readers who are just getting started with scrapbooking.
Also, everything you see in my designs have been made with kit components aside from a very few, scant items; like mist, colored buttons, embroidery floss.
One example is the headband above: The floral ribbon is from my stash.
EnJ.O.Y. your day. Check back here throughout the week as I will be posting more about the kit here and have a tutorial or two to boot! Feel free to post any questions by commenting. :)
Subscribe to:
Posts (Atom)